Learn From the Dental Industry's TOP LEADERS!
Sit Chairside withDr. Dennis WellsCreator ofDURAthin® Prepless Veneers- OR -
|
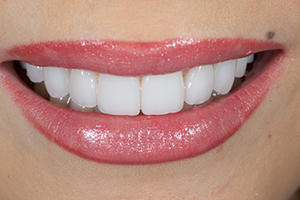
No Prep Veneers Part IIPart 1 - Try-in
Instructors:
Dr. Wells will first try-in the veneers dry and then he will use a clear try-in paste.
Welcome back to day 2, our part 2 series of prepless micro thin veneers. You know, I say in our courses that we give here in my offices that this is the really fun day where we get to actually put the permanent work in and see the fruits of our labor here. So come join with us as we see a good smile turn into a great smile. We've already removed the prototypes that we've placed in the last visit and we got our teeth real nice and polished up and cleaned up which obviously is very important. We want to be sure that we don't leave any even slight residue of composite that we use for our prototypes in that when we're pushing these veneers into place that could really create problems and possibly cause a fracture. But we've been very meticulous in cleaning this and not only taking a flame shape carbide burr and removing a little bit of composite where we etched but then also taking a silicon wheel and polishing and smoothing the teeth which allows us to see if there's any possible composite left. It will look a little different than the enamel. It won't polish up quite as nicely so that gives a check to be sure that our teeth our definitely clean. So let's go ahead and start by trying in. We'll start with number 8. What we like to do is try these restorations in dry. First of all, we want to use very minimal pressure and that's readily obvious. Why? Because we do not want to break these, they are very delicate at this stage of the game. Basically what we're doing is just confirming, let's see a mirror please, that the veneer does sit very well. It's not held up at all and does absolutely fit as ti does on the model. One misconception about prepless veneers is that they're just going to scoot and float all over the place because there's no prep margin. But that is just not true because they wrap over the incisal and because they fit real accurately around the tooth as with a commisional veneer, they do not move around and float at all. As you can see it's very stable, stays in place very nicely there. That is a very nice fit. Now the next thing we'll do now that we've confirmed that number 8 fits real good, we're real interested to check our color. So usually, the very next step we'll take is to take that off and go ahead and put some clear try and paste. We always start with clear as our workhorse and our starting place. Then we're going to sit this very carefully again not a lot of pressure. Let's see all the way to place with the clear try-in and then we're going to rinse that clear in. Now that it's held by the try-in place we can rinse it without any worry of it coming off of there. Okay. Now we're going to take our shade guide because in our first appointment, we agreed upon a range of color that we wanted the outcome to be in. In this case, the desired shade was somewhere in the OM2 range and hopefully it's coming across here on video that we're really close to that. We're not quite up to the OM1 in brightness. We're a little ahead of the OM3. So we're somewhere real close to the range that we had talked about and agreed upon. So that is good news. That gives us the green light to continue our try-in and to know that we're in the color range and now we're going to go ahead and verify that architecturally the restoration is fit and look real good to us. We're going to start with number 7 here Michelle and dry. We'll keep working around to the right side here. So we look for a very passive fit here. We do not want to have to push or do any kind of persuading. The veneer should definitely go right to place is it does there. Okay. Let's go ahead and put some clear try-in in that now and we'll continue to work our way on back. Without the try-in gel the veneers do tend to ñ they can come off. The try-in gel kind of works as a suction to keep them in place. So once I verified they fit real good, I like to go on and put the try-in paste to keep that in place first and the try-in gel and make sure that it doesn't move around on me. Okay dry now number 6. These are really looking good. Juan our technician, Juan Rego has done a terrific job here so far with these fitting beautiful. Okay, clear try-in on number 6. Excellent. Okay, number 7 dry, excuse number 5 dry. Beautiful. Okay let's go with the try-in paste there number 5. Excellent. Okay. And then lastly number 4 on this side. Beautiful. Yeah it looks perfect okay. Let's have a clear try-in. Notice I'm not trying to hold these and floss between them and check contacts and things like that. That would be really difficult to do and probably create some issues. We're confirming that we have nice contacts by number one observing that we have a passive fit. Meaning that I can take my explorer, push on all these restorations and notice that the adjacent teeth are not moving or tending to bump up as we put pressure on the one beside it. So a very passive fit. And then number 2 when we rinse this and dry it, we'll be looking for visible contact. Meaning that we're just taking our enteral mirror and being certain that the veneer wraps all the way to the other side and touch this as all of this do. So I'm getting very excited. That's a very nice fit and no adjustments or any necessary calibrations needed that fit right to places we would draw it up in the book. So we'll continue to the left side in exactly the same way. Beautiful. Okay Michelle let's put a clear try-in there. You can also get a good visual before I put this left side on of the amount of augmentation that we're making, which is, fairly subtle in some ways but also is quite profound in others. But you get a real good visual comparison of the unveneered teeth on the left side versus the veneers on the right side. Okay let's try number 10 dry. Once again a very nice passive fit. Beautiful integration here with the lingual incisal margin. It wraps around and stops beautifully there. All right. Let's add a clear try-in. Perfect, okay, number 11 dry. So we're trying these in dry first just so we don't have a lot of paste in our way that makes it difficult for us to see and confirm visually that it's a seat and that things are right where they're supposed to be. That's perfect. Let's have the try-in paste. Once we confirm that then we put some try-in paste in to kind of hold it in place as we are checking all of the teeth at one time and being certain that our impartial contacts are spot on. Perfect. Okay. Trying in number 12 now dry. Again looking for the incisal view to verify that our margin the termination of the ceramic is right where it's supposed to be. That's perfect, clear try-in. Lastly number 13. Beautiful. Okay. Clear try-in there. So a very important step to take is to go tooth by tooth and confirm one more time that everything is passive, that nothing is moving and jumping around, hopefully implying that our impartial contacts are right where they need to be, present but not too tight. And that seems to be the story here, a real nice job by our ceramists. We're doing our inset just a little bit. Okay. Very nice. So we have just confirmed that we are good to go here to seat this case, to hand this off to our team to prepare the veneers. So we're going to go here to remove these. Let's start with number 9, 10. |

 FAGD/MAGD Credit Approval does not imply acceptance by a state or provincial board of dentistry or AGD endorsement 7/31/2018 to 7/31/2021 Provider ID# 317928
 Submitting...