Learn From the Dental Industry's TOP LEADERS!
Sit Chairside withDr. Dennis WellsCreator ofDURAthin® Prepless Veneers- OR -
|
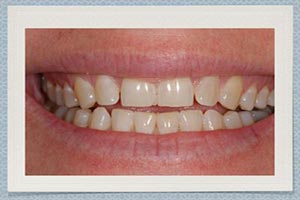
The Art of a Beautiful SmilePart 2 - Preparation DesignI found as a compare preparation design today to what I used to do and how much less aggressive I am and how important that is to preserve the tissues of the body of the teeth for lots of reasons. Of course, we don’t want to do any more harm than we need to. When we cut on something, it’s forever change and we don’t get that back. So the more conservative we can be in the designs and how we prepare teeth, the better. The prep guide the technique that I use base upon my diagnostic wax up and the use of Luxaflow or Luxatemp preoperative gives me a very defined parameter in which to prepare my teeth. And I have found that as I’ve used that that the amount of reduction on my tooth structure has gone way way down. We’ve maintained the integrity of the enamel which is precious to us in terms of being able to gain great bond strength and certainly diminishes the chances of postoperative sensitivity, the more that we can preserve that. We’re going to do a mockup matrix from the diagnostic wax up that we’d created preoperatively. This will act as a reduction guide for us. And I think what we’ll probably going to find out from this is that we are going to have to do very little modification of the tooth structure which is always desirable. Are you doing all right there? So this gives us a nice preview of the direction that we’re going to ultimately wind up with right here. We’ll have a few modifications to make but that looks pretty good. This is a great product. It sets up real firm and allows us to prepare it in such a way to give us nice resistance that replicates closely the tooth structure which gives us a nice feel in terms of our preparation technique. You can see right here where we added that on and what’s clear from this is that you can see the shine through of the underlying preparation in these areas throughout here. And we know that these areas are probably areas we’re going to have to reduce just a little bit more. And as we move posteriorly, you can see where most of the underlying tooth structures is already [max out] so we know that any amount of reduction on our tooth structure is going to be very very minimal there. This is the product that we use called OptraGate through Ivoclar. It’s a fantastic mean to create a more accessible and clear field of vision when we’re preparing the teeth. You can see how it nice they reflect the lips and the cheeks. It gives us easy access to the posterior area. The first thing I’m going to do is go through with a depth cutter right here and we’re going to make our depth cut incisally and facially throughout right through the Luxatemp or the Protempt excuse me. And it’s going to begin to be our guide of how much reduction we’re going to have to do on each of these teeth. I like to always start out incisally from my depth guide reduction there. I drop that to the depth of this, which about three tenths of a millimeter. And then I will do my facial depth cuts. And as you can see I’m wearing my bur right on the facial aspect of the Protempt. And as I go down, I want to contour my handpiece to replicate the natural contour of the tooth structure or of the anatomy of the tooth I’m reducing. And we know on central incisors what we’re going to see is from incisal to cervical there’s sort of an angulation that occurs there. We want to keep that angulation as we go in and do our depth cut so that we don’t over reduce the two. You can even see in these posterior areas here but we’re not even getting into or even touching really the tooth structure itself. And you’ll able to see this once we take off all this material. Again, you can see how I kind of get angle it at the incisal and then I straighten it a little bit through the mid facial and then angle it toward the gingival as I get toward the gingival area. Now you can fully see how I’ve gone right through and just prep right through the Protempt. And now what we’re going to do is go down and reduce to the depth of each of those areas. So I’ll take this bur. I will drop it into and move mesially and distally making sure that we eliminate all evidence of the depth fact that ensures that fact that we have reduced adequately. You can kind of get a picture here now. We’ve reduced the left side and now going to reduce the right in the same way. Again, I’m keeping the angulation of my bur to conform with the natural anatomy of the tooth. This again just minimizes the chance of over reducing where we don’t need to and maintaining the integrity of the enamel as much as we can. Are you doing all right? Just the thing that you wanted to do this morning, right? So now you can see as we reduce this I’m going to go through and remove the excess Protempt that may be still adhering to the tooth interproximally and palatally. And then we’re going to get a true picture of the reduction that we needed to accomplish our esthetic goals without having to take away too much tooth structure. You can see here how we’ve now reduced and really we’ve not changed much of the tooth at all. We still maintain the integrity of so much of the enamel of the tooth. You can see some shining through of the underlying dentin. But that’s because she was a little thin there in the cervical half of the cuspid in laterals. But overall pretty conservative there. Now what we’re going to be doing is going in and defining the preparation design. I do this with a tapered diamond with a very thin rounded tip. My goal is to stay super gingival if I can. The shade that we preoperative look at that we like is going to be, we think it’s going to be ideal particularly because our prep shade is going to be very light. And we’ll be able to pick up particularly toward the cervical half the natural color of her teeth. This area right here on the central really tapers in significantly at the cervical so I’m going to reduce just a little bit more in that cervical [one quarter] and you can see how I’m just kind of forming right around the gum line. One of the things, the technique of preparation that I like to follow is if I hold the bur vertical to the long axis of the tooth the tendency there particularly when I’m designing my gingival margin, you have to very conscious with that because you can over reduce in the middle third of the tooth. So what I like to do initially is actually angle my bur at about a 45 degree angle as though I’m drawing and scribing a little line a little margin right along this. And once I do that, I follow my principles of prep design. Then I could come back in and then put the bur more vertically and eliminate that little undercut that I create but it gives me a very stable reference point as to how I can move my bur. The key element here for us is to provide our ceramist with the ideal prep design so that they can replicate exactly what we want based upon our preoperative analysis through imaging, computer generated imaging, which I use without fail in my practice and case presentation. I use a product called Envision a Smile, which allows me the opportunity to create anatomically correct images that the patient will view during their presentation which generally the patient is accepting treatment based upon that. |
 FAGD/MAGD Credit Approval does not imply acceptance by a state or provincial board of dentistry or AGD endorsement 7/31/2018 to 7/31/2021 Provider ID# 317928
 Submitting...