Learn From the Dental Industry's TOP LEADERS!
Sit Chairside withDr. Dennis WellsCreator ofDURAthin® Prepless Veneers- OR -
|
Making Smile Design Profitable, Efficient and PredictablePart 4 - Creating the provisionals.
Instructors:
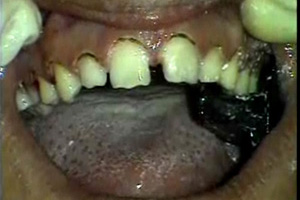
In this segment of the dental CE video, Dr. Smallwood demonstrates techniques to create beautiful provisionals.
So, here you will notice the pre- op models, we have diastemas between 8 and 9, between 5 and 6 and also between 10, 11 and 12. We have good arch form and based upon what we have as our arch form, we are able to improve all of these areas tremendously, you will notice all the diastemas are closed we are able to improve arch form even better and as a result we even able to create some incisal characteristics that are just phenomenal. This all done within the wax up and this is what is going to be able to create a beautiful provisional in the future. Now another great guide that Gold Dust Labs is able to help us with, in regard to this type of ceramics is the reduction mold. In this particular case with Michael, only tooth number 9 needed to be reduced heavily on the facial and that was just to bring it into the correct arch form and as you saw during the preparation sequence that was the tooth we spent just a little more time on. Now using a custom tray that were made by Dentrix we have 5 or six of these in varying sizes. So as far as the differing use we just need to find one that is going to fix the wax up perfectly. These I have had for the last seven years and I have five or six of these and we just put them in a cold sterile because they never really get contaminated. So this will just fit right over the wax up of our model of our provisional, and again this is all done while Amanda, my assistant is holding in the impression. What we will simply do is we begin by injecting clear bite registration material right on the lingual directly in injecting. You have to be kinda quick with this because it sets in about 30 to 40 seconds. So I will inject some right onto the teeth, the rest right into our template or our stint and then we will basically super impose these right over one and other, clean off any excess. Often using a spatula we are able to clean off any oft-hat excess. Again, this begins to set in about 30 seconds to-total set time is about two minutes. Also notice the palate has been cut out so we do not want that to impinge on the palate or that will keep it from setting or fully setting rather into the mouth. So as long as we have a nice template we will let that set for a few minutes. Using Ivoclars, tetric flow 0.30, this material we will be placing within the incisal of the stint tobe able to create incisal characteristics without having to have to do a cutback technique. I know I have already mentioned this already but all of this is done while the master impression is being taken so educational purposes I am going through with this step by step but normally this entire process takes about two minutes and it is nice we are just waiting on the set time there and we will pull that stint and I will show you the next aspect. O.K to remove the template, the key is tobe able to remove the entire apparatus without of course destroying the wax up in the interim. What I will typically do is I will use a spatula and try to pry it, up and then this will then separate off and as you can see it can be used another 300,000 times, it's no issue. Here is a template in its very basic version, as I will actually be using scissors to trim the excess. I will lightly tease this off, again, finesse is more important than brute strength her we want to try to do this in a way that preserves the integrity of all the teeth as remember these are all in wax. Sassy! Everything came out nice and re-usable in that sense that if we need that wax up for anything else. Thank you Amanda, you will then trim the excess,which hopefully isn't too much, and now we have a ready stint that is ready made, very simple to use. Now if you can see from the incisal position, this is where we want to add some incisal characteristics so using an .030 I am going to inject about a millimeter right on the incisal surface, I usually go back to the first bicuspid. You can see this barely and what I will then do is invert it and pull up the incisal, now what Iwill then do is invert it and pull up incisal and drag that incisal .030 upward, and then I will cure it. We will be able to show how this is the small little fingers is what I am creating a resin; we'll be able to show that and actually illustrate that in just a moment. I cure this for about 15 or 20 minutes total because once we have this in the mouth we will be curing this again. Here you will see some beautiful incisal characteristics with the small fingers coming across almost create and anti-mammalian effect that simply put, that incisal is clear now so it does not show up quite as well, but once you see this with a bisocryl back behind this material it really brings in a beautiful incisal. What we want to be able to do is take our bite registration and Michael has his centric relation-is right on the cue of the centric occlusion, so as a result we do not have a cr/co discrepancy so we are going to be taking more or less a C.O bite which is unusual, it only occurs about 30% of the time. Now what we do is we use Luxabite material because t is a very rigid bisocryl material that is blue and place it we'll b able to register this bite perfectly. I usually place it on the right and the left and Michael go ahead and bite all the way down and just stay put right there. As you can see the this material just set's tooth to tooth and Amanda and I will just hold him closed so he will not inadvertently open and we should be all set. O.K Michael go, ahead and open, because this material is fairly rigid we will need a scaler to remove it. Now the provisional phase is kind of a critical timing phase, because what happens is we are going to place some cotton roles and we are going to dry off the tissue and then we are going to place a de-sensitizer on there which can be Systep or Gluma or really any material of your choice. Also, we are going to want to make sure that we are going to use a brush, ore or less a bend a brush because this will not elicit any bleeding at all. What will happen is we will go ahead and place this right on the chest and Amanda will start to, Amanda and I will both start to place the the desensitizer, in this case we are using Systemp. We will coat all the way around, we'll let that sit for just a moment and then usually with just some two-by-two's we will begin to just blot dry that. Now the next phase is where Amanda herself, my assistant will place the primer and the primer is just placed without etching just to get a good seal between the bisocryl and the tooth. I then will start to begin to fill the stint with the bisacryl. I use Luxatemp with fluorescence because it tends to have the best overall esthetic look and as I am placing this I will give Amanda warning that Iam starting to place so that she can pull the cotton rolls in time so that we are not fighting over the patient there. And Amanda are you all set Here I come. Thank you, I will then place the stint directly over, don't bite down Michael and you can probably see, probably see the stint is fully seated we don't have a lot of excess here. We may end up using some tetric white to do some reduction of the back opacity that we have placed and the incisal characteristics. But as a result weare now about only 3 minutes in regard to the procedure, with-regard to the provisionals and once we take this out we will have very little excess and we will be able to clean it up a little bit, check occlusion and let Michael go. Now I should say that while we are waiting of this Amanda is checking to seethe check time because we want to be able to cure once the acrylic has begun to set, she will come in with a curing light and start to cure and this basically integrates the flow material to the bisocryl and makes a nice consistent seal with all aspects to the provisionals. So she will roughly run 5 seconds over every tooth, moving around on the facial incisal to the gingival and hitting all aspects The lingual is not as important her because of the fact that our preparations did not really extend lingually at all. Normally at my practice I would be right at about 50 minutes at this point, from start to finish and we have a little less than 10 minutes left of just clean up the provisionals, checking the bite and taking a final face bow with a final bite registration of the provisionals into the lowers, and then we will have Michael back in a few days just to check those provisionals. And what I will do here is just bend, very lightly the material back, and we just need some add on, and as a result we've got temporaries that are near ideal some areas we may need to fill where there are some voids, O.K. number 6. Filling any voids is simple at this point. And we look for any lingual and we seem to be in pretty good shape through out. |
 FAGD/MAGD Credit Approval does not imply acceptance by a state or provincial board of dentistry or AGD endorsement 7/31/2018 to 7/31/2021 Provider ID# 317928
 Submitting...