Learn From the Dental Industry's TOP LEADERS!
Sit Chairside withDr. Dennis WellsCreator ofDURAthin® Prepless Veneers- OR -
|
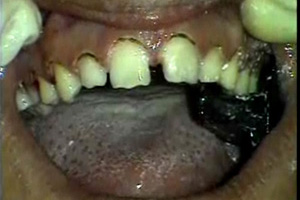
Making Smile Design Profitable, Efficient and PredictablePart 6 - Try-in the final restorations.
Instructors:
In this segment of the Dental continuing education course, Dr. Smallwood tries-in each of the final restorations, asks the patient to evaluate the look and then prepares for the seating of the restorations.
Now we have the restorations placed on the articulator as well as the model here. We have looked for function and everything is in very good shape, Amanda is going to hold these as I just start to place these in dry and passively within the mouth just to ensure a good fit and once we have completed that we will then try in gels and make sure Michael likes them and go from there. So we will try each one of these in dry, and it is really critical here that you watch each of these veneers for both fit and position because of the fact that also this is the most dangerous time and Michael I want to tell you not to talk during this time, not that you have been anyway but, what can happen is we always want to have a tweezers close by because sometimes one of the veneers will tries to get away. What I will typically do is I always like to put the two incisors in just to make sure the initial mid-line is on then I will put the right side in, verify marginal integrity, which we are in great shape all the way through and then I will take them out to place the opposite side in. And we can go ahead an verify,we've got good positioning and great marginal integrity on everything so we are in great shape and everything fits beautifully. This now will set us up to use our try in gel. Michael you can relax for just a moment. The next two items that we will be using are a try in gel both b and XL, one on the right one on the left to simulate what type of cement we end up choosing. There is really right or wrong answer with regard to when we put these in and Michael let me explain what we are going to be doing. The veneers are very translucent they take a lot of their color from your natural teeth, in your case you teeth are really light. We are going to put one color of simulated cement on one side and another color of simulated cement on the other side and you are going to actually notice that one is actually brighter than the other. Now you may chose that side or you may like the opposite side, we just choose. It's your choice but I will kind of counsel you as we go through this but I want you to be able to at least see. So what we do is we bring our veneers back in and as we've got this lighting situations' is, I am going to just take them off and what we do initially is place it right within initially, just a very small amount and then we place it right onto the teeth. Now you will notice right here is where we have a slight value shift here where there is a little less value on tooth number 8 verses tooth number 9 who's got a little more value these are all the items that we are going to look at very closely when we are evaluating which shade we like the best. Next, our patient will call upon friends and family to help him evaluate his smile that way the patient can be sure they are getting exactly what they want. With regard to the placement or the seating sequence. One thing, to be able to make sure that we ensure that the expectation is met by the patient, I show them their new veneers, not fully seated in the sense of permanently but I show them in a try in gel in several different lighting situations. For example I will show them in the room. I will open the windows so they can see with natural light to some degree but then we also have some incandescent light and some artificial light so they need to be able to see it in that element. Plus I will even shine the overhead light directly into the veneers so they can see them with direct light and then I will actually take them outside where we can see it not only in shaded light and somewhat diffused light but we can also, if the sun is bright enough we will be able to show them with natural light completely. All of those elements show a completely different shade of these teeth and I want them to look at everything, and the reason I want them to approve everything is once they do verbally they will be signing a consent form in my office that says we can we can move forward on this. This is something that I have had to use twice in my career because the patient felt they were not white enough and when they looked at the fact that they approved it, those evaluating the situation looked at it very favorable for me because they said, "well you did approve them.' Numbering and then laying the veneers out Dr. Smallwood will next rinse,re-etch, salinate and place the Variolink. Now what we have done is we have removed all of the veneers from the mouth and done a basic rinse and now we are going to go back and so a full rinse on every single tooth. As you can see there is going to be just a little bit of remnants, a little bit of remnant of the try in gel, and if we clean it off completely using air/water and fully dry it you see we are getting that nice frosty look again. We will re-etch using a phosphoric acid 40 percent, placed with in the veneer just to clean off any surface contaminants leave that on for 30 seconds and rinse. Using Monobond S we now salinate the interior of the veneer and place into a covered surface. Lastly we use the Variolink XL on tooth number 8 we are going to be using B on the rest of the restorations and we put just a very small amount with in. To keep the area dry, Dr. Smallwood will now place a rubber dam. O.k. and we will place it on the right side, and you will get alittle pressure, Michael hold on, very good. And then what we have done is we have actually punched two holes in the rubber dam that you can see here, about an inch apart and then we just used scissors to connect them, right in the middle of the rubber dam. We will then place one side over, holding the clampdown, stretching down to the other side and basically initiating both sides. Michael you are doing a wonderful job, I then place a little bib over there. The rubber dam is really essential, and I know there are a lot of doctors that do not use a rubber dam but I have to say I use it routinely for smile design because it just will help with long term bonding of the materials because we are really able to minimize the humidity within the mouth completely. I gave a little bit of breather for the nose and then I will just very very gently stretch to avoid tearing the rubber dam over the front of the teeth. Michael you will feel a lot of pressure on your gums because you feel it up there. To isolate the palate we will dry it off with a 2x2. Then I will basically web in a material, in this case it is a blue mouse but any fast setting material will work. Key to stay off the holes and completely isolate that palate without any holes what so ever showing through and now we've got complete isolation. I am going to come back and just basically blot dry before I come back and etch and will be using a 40 percent phosphoric place it on each tooth and I will usually start from the center and move down one side doing 3 to 4 teeth at onetime not wanting to exceed 10 seconds on each tooth. Amanda will come in and basically remove most of the material off with the high volume suction and I will come back where I started. Dr. Smallwood will etch the single tooth on the right side before using the same procedure moving to the left, and then just mildly dry. I don't over dry what so ever. I do not dessicate the teeth what so ever and now I come back and blot dry, Amanda can I get a 2x2 And I actually will dry just pat down the gums as well as the teeth. |
 FAGD/MAGD Credit Approval does not imply acceptance by a state or provincial board of dentistry or AGD endorsement 7/31/2018 to 7/31/2021 Provider ID# 317928
 Submitting...