Learn From the Dental Industry's TOP LEADERS!
Sit Chairside withDr. Dennis WellsCreator ofDURAthin® Prepless Veneers- OR -
|
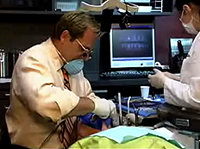
Common Sense approach to Molar Root CanalsPart 5 - TemporizationYou'll see we have plenty of room in there for appearance. Again Bob Clark tells me he likes 1.5 so I'm going to give him 2. There we go. Let's just go. Let's take an impression of that. We'll do a closed-bite impression. GW what I'm doing is squirt some potty material in there and I'm going to have you close down just in that bite. It will take about 3.5 minutes for this to set up. And then Victoria is going to make you a temporary and then you are all done my friend. You know an impression keep it nice and dry. There's no bleeding. So we're good there. Very good. Press it right there. Close down for me all the way from your left side. Perfect. Squeeze that real good and tight. Just hold that force. Three minutes and then we'll be all done. That is root canal, build up and crown. Thanks. All right the buzzer went off. GW open for me. Take a look at our impression. Very good. Now this is only if you like perfect. That's about as good as we're going to get. That's beautiful. What we'll say around is Stevie Wonder could see those margins. So beautiful. At this point, hey here's what we're going to do. I'm done. And so I'm going to go off and do check, hygiene, see my next patient. Victoria is going to make his temporary, check his bite, and we'll do a final bite length measure on those margins on the temporary look good. And then GW I'll see you in just a few weeks. Okay. You do great buddy. Thank you sir. I'm going to start to prepare his temporary. Just rinse him out. I'm going to use Luxatemp A2 for his temporary. I'm just going to squirt a little on my tray so that I can know when it's about set. Okay for me. A little bigger. Bite. Okay. Just let that sit. Okay. I'm going to go ahead and remove it. Open. And I'm just going to use the scaler. Now when he came in the distal cusps was broken off. So in the pre-op impression that I took I just kind of hollow it out where that space was. Okay. I'm going rinse him out. I'm going to trim that temporary. And I normally just use two burs this green stripe and gold. And then I'm going to try it in and have him bite down on some articulating paper and have him, I'll take his bite just to be sure. I try to get the majority of my trimming done outside of the mouth so that when I do put the temporary in, there's not a whole lot of in and out adjusting. Bite. Open. So now my marks are pretty much minimal. Open for me. A little bit of redness that is here. I'm just going to take and polish that off. Slow speed in this blue cup. Take this and I'm going to polish it. I just kind of check his contact. Okay. Now we'll also going to tell the patient not to floss. We check it just so we kind of make sure that that space is kept but we don't want them to floss because we don't want the temporary to come off. So we tell them to pull the floss down if you have something in your teeth and just pull it out don't come up with it. So now I'm just going to cement this in. I'd rather tooth completely off. Now I'm going to use some Brush & Bond on his teeth not the buildup. If you put the Brush & Bond on the actual buildup it can potentially cause the buildup material to come out with the temporary once you take it off. And this is what I'm using Brush & Bond right here along with the applicator brush. Got the tooth off again. I'm just going to go on the enamel or dentin cause all the enamel is gone. And then I'm going to light cure that. And I'm going to remove the excess cement first before I light cure it and I normally just take my same Brush & Bond brush. Bite down and squeeze. I don't know if you can see but whenever he bite down that temporary material kind of squeeze out a little bit more and that's kind of what you want. And this part after finishing the root canal is really critical just because you want to make sure that the temporary feels good to the patient's tongue. It's smooth. A lot of patients complain about the roughness of temporaries not being as smooth as permanent. And of course it is because it's acrylic to porcelain so it's not going to feel the same. But you want to make sure that you make it feel good to the patients tongue so that they really don't know that I'm in a temporary. Open. Okay. Now I'm just going to light cure it. Then I'll take a post-op x-ray and that will be it. |
 Submitting...


 FAGD/MAGD Credit Approval does not imply acceptance by a state or provincial board of dentistry or AGD endorsement 7/31/2018 to 7/31/2021 Provider ID# 317928