Learn From the Dental Industry's TOP LEADERS!
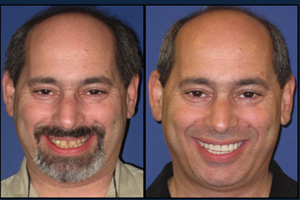
Sit Chairside withDr. Dennis WellsCreator ofDURAthin® Prepless Veneers- OR -
|
Immediate Fixed Implant Supported Hybrid Prosthesis (all-on-4 technique) from start to finish, a complete casePart 2 - Surgical Guide
Instructors:
Dr. Margolin demonstrates the use of the bone reduction guide and discusses with the lab what is necessary to fabricate the bone reduction guide.
Our bone reduction guide as you can see on the video it makes sure that we have enough space for restorative components. We like to have about 18mm. We need about 2mm for our multiunit abutment, 4mm for our titanium CAD/CAM bar and 2mm for acrylic and about 10mm for denture teeth. It's very important that you have that reduction to fit those restorative components. You're better off over reducing than under reducing cause you can always make up the difference with the acrylic. Another thing to take into consideration is to check the patient's lip line. You want to make sure that you have your transition line. That's the line between where the acrylic and the denture is of your prosthesis and the patient's tissue is beyond their lip line. You don't want that to show or that would be very obvious. So that's another thing that needs to be taken into consideration when doing your bone reduction. Now the bone reduction guide is something which is processed by the laboratory technician. Sammy, give us a little information about how you actually fabricate that bone reduction guide. Well it all starts with the diagnostic workup. If you have an edentulous patient the process is similar to making a new denture. You start with wax frames. And we'd like to have the incisal edge position, the smile line, the midline, where you place the cuspids. And for a dentate patient we start with the existing arch. We have a cast of the existing arch and we basically do a wax mockup to lengthen the incisal edge and fill in the occlusion plane and from that we make a Snap-On smile. We use the Snap-on smile to verify the incisal edge and adjust it to the liking, the esthetic liking of both the patient and restorative dentist. From there, you know, we basically go back and reduce the cast and pretty much it's like making an immediate denture. We make a duplicate of that immediate denture, a clear duplicate denture. And that will serve as a clear surgical guide. We measure, usually its 15mm, but if the smile line is above 15mm we just go all the way up to the smile line. And cut out a window in the surgical guide to allow you to see where you need to reduce the bone. On the lingual of the surgical guide we make a trough behind the six anterior teeth to give you visual on the implant. So you can look at the angle of implants and make sure that access hole is coming out the lingual rather than the facial of the tooth. Same on the posterior teeth. We just trough a window underneath the posterior teeth and just again to give you a visual on the implants. You definitely want your implants to be on the palatal aspect of your prosthesis. For multiple reasons, you don't want your access holes coming out through the teeth especially through the facial of your teeth. It makes it much harder cosmetically to mask that. And even from a surgical aspect you're going to have much better bone on the palatal aspect, the bone on the facial especially if you're in extraction site is going to be very thin. And it's a nice thing to be able to cheat towards the palate and utilize that thicker cortical plate. If you're dealing with the case like what we show in this video where we had a multiple extraction sites sometimes you have to use the extractions sites for your implant positions. If possible you like to utilize host bone is actually an extraction socket. You can see in the front the flange has been cut back and the lab with our diagnostics has shown me how much reduction I need to gain in order to fit our restorative components. So this here is actually my bone reduction guide. And then we have trough cut so that it keeps my position towards the palate so I'm not coming through the teeth of where we want to place our anterior implants. We have our flanges and the teeth to help stabilize the denture and then we can use our markings to check our VDO to make sure that everything is right where we want it to be. So first thing we will try in our appliance and we can manipulate him into his bite. So you could see that we're not lining up and VDO is too high. We have about two to three millimeters of bone that we're going to have to remove in order to create our space for our restorative components here and be able to have them close into his normal bite. Now we'll smooth of our ridges and create our vertical space that we're going to need. Okay. So I've done some bone reduction. Now we can check our VDO again to make sure that we have some adequate reduction. And here we see our denture is definitely fitting better in lining up now. Let's take off his nosepiece. And we are right on target. So we have now achieved adequate space. It might take just a millimeter more. You're better off having a little extra space than not enough. We are within a millimeter of having that space we needed for our implant component, our bar and our dentures. So we're ready for our next step. We're ready to start preparing our implant osteotomy. We've established our appropriate bone reduction so that we've established enough space in our restorative components. Check our VDO with our bite stick and now we can use our bone reduction guide as also our surgical guide and we can place that and let's have him open. Why don't we put a bite block in there and we're going to use our lateral positions. And you can see our guide is going to keep us towards the palate but within our bone and based on our CT scan we know our depths that we want to drill to. No. 7 we're going to put a regular platform 11.5 mm fixture and no. 10 we're going to go for a 13 mm fixture. So we're using the NobelActive and we're going to use their medium bone sequence. So I can see my initial osteotomy using my implant probe. And no. 7 we wanted to get to 11.5 and I think we're going to be able to go 13. And no. 10 we're going for 13. Right now, we're at about 11.5. palatal aspect of the extraction socket. This enables us to take advantage of that nice stent palatable plate of bone and also keeps our implant lined up within our respirations so they're not coming out to the teeth and the facial. What I'd probably do here especially since we're starting with extraction socket is we'll under-prepare the bone in order to try to hit the torque. You want to have a minimum of 35 N-cm of torque for immediate loading. And if we under prepare and it's too tight it's a lot easier to take away than if we over prepare and they're not at torque we want then we're out of luck. So I'm actually going to stick closer to the soft bone sequence and we can always expander osteotomy if we need to. What we're going to do now for our posterior implant we are going to use the All on 4 guide. The first thing we're going to do is create an osteotomy down the midline and that's just to position our guide. This is the All on 4 guide and see it's a, you're doing great Michael. Open for me. It's rather a simple guide. It's a horseshoe shape. Open wide for me. See our guide has some laser etching on it. And what this does is it helps us stay parallel within the arch and also for our most distal implant we're going to want to put that between a 30 and 45 degree angle to increase our mechanical advantage. And this helps us line up our drill so that we're at the proper angulation on the posterior implant. Now this is flexible so you can bend it to the shape of your patient's ridge to help you line up your implant placement. Initial osteotomy site wherein or lateral sockets so we're going to go to the first molar sockets and for our distal implants we're actually going to go back by the first molar. So we got our paralleling pin in there. We're going to stay towards the palatal aspect of our socket and we want to get a 13mm fix drill here too. Now we're going to go with our distal fixture. This is the one that we place at an angle. We actually angle our osteotomy. Okay. More water and vibration now Michael. And you see according to our guide we're at about 45 degree angle. If we look at our parallel lines maybe about 40 degrees. That's just about where we want to be. And we have not perforated into the sinus, we feel comfortable with that, based on our CT scan and we're at about 11.5mm back there. Our bone quality is a little softer back there. So again we're going to go with our soft bone sequence. We're going to attempt to place a wide platform fixture though. And I'm just going to use the last drill in the soft bone sequence just to open up the cortical plate but not really remove any bone. Enter a little bit there. Now do the same thing on the other side with our sequence. Go to premolar site on the right. And once again we can use our guide to keep our parallel to our lateral site. And here's our premolar site. Check our depth. It's 13 and then our final site will be our molar site that we'll place at angulation. |


 FAGD/MAGD Credit Approval does not imply acceptance by a state or provincial board of dentistry or AGD endorsement 7/31/2018 to 7/31/2021 Provider ID# 317928
 Submitting...