Learn From the Dental Industry's TOP LEADERS!
Sit Chairside withDr. Dennis WellsCreator ofDURAthin® Prepless Veneers- OR -
|
Immediate Fixed Implant Supported Hybrid Prosthesis (all-on-4 technique) from start to finish, a complete casePart 5 - Preparation for the Fixture Level Impression for the Master Cast
Instructors:
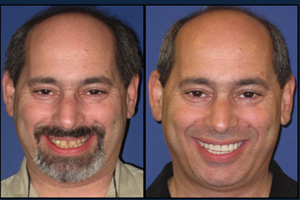
DR. Margolin makes a few repairs and prepares for the fixture level impression for the master cast
We're back here with Mike and it is now July down here in Texas running triple digits. Mike flies in from Chicago so give me a smile on the camera. You might see that we have a few repairs to make. We lost a denture tooth and there's one in the back. You can't see on the screen. So we have a few repairs since he comes from out of town. So we have a few things on the agenda for today. It's about 10 weeks since we video the upper All on 4 as we did All on 6 immediate temporary. And at the time we were able to utilize four of the fixtures. Out of the six, two of them didn't get to our required 35 N-cm torque which is why I have decided to go with six on the top instead of four to start due to softer bone quality on the maxilla. So on the agenda today we're going to remove the upper prosthesis and we will take a new impression, fixture level impression for master cast so we can fabricate his final bar on the maxilla. We've fabricated the final bar already on his mandible which we're about to three and a half months since those fixtures were placed so we can try in the final CAD/CAM bar and make sure that we have a good fit before putting on the final acrylic. So here is mandibular immediate prosthesis. We placed four on the mandibles. We usually go six on the maxilla and four on the mandible due to better bone quality on the mandible. So we didn't film the mandible but we did the All on 4 technique and this is looking fantastic. We're about three and a half months. Now he's been in his temporary and we'll be trying in the final. But we have great looking tissue health there. Everything looks really nice. You can see we fracture the prosthesis right there. It fractured right at the temporary copings. So we'll be trying to repair that today when we got our final impression. So first thing we'll do is we're going to try in the final bar on the mandible. We have some temporary material which we could take out, sealing the access holes. We got all the provisional materials out of the access holes. So now we'll be able to remove the prosthesis. We got good healthy ridge there. Everything looks real nice. And here we have Michael's mandibular implants. We didn't have this surgery on video. But we place two straight in the anterior with two straight multiunit abutments and we did our about 40 degree angle implants and the posterior and those have 30 degree angled multiunit abutments there for more of a standard All on 4 first what we did on his maxilla. But we are ready to do a final try in on his final bar, CAD/CAM mill bar. Here's the final CAD/CAM Mill Bar with you can see the attachments which will go over the multiunit abutments and then our lab tech Greg has waxed up the teeth and he did a really beautiful waxing job there. It almost looks like acrylic. And we'll be trying this in and then adjusting the teeth as needed. Now this CAD/CAM bar was milled based on the master cast which we fabricated his original prosthesis on, his immediate prosthesis. So this should fit the same as the original did. But we have to try that in make sure everything fits passively. Well the first, the provisional was just an acrylic appliance but as you can see he broke that. Normally, you know, they'll break sometime over the course of a year if you don't get them to a bar. Mike broke his a little early because he has powerful jaws. So we tried in Mike's final bar and three of our fixture sat and then on our lower right we did not engage. And we took a look at the original master cast that we made his provisional on and we noticed that we've had quite a bit of excess tissue growth. You can see how this posterior fixture now looks a little buried. So every time you do one of these cases, there's going to be something else that slows you down. And so today with Mike is we have a little bit of tissue impingement on the integrity on surface of the final bar prosthesis. So we're just going to clear that back down closer to the original shape to make some space for that to sit. So we've already anesthetized the area and check to make sure that Mike wasn't feeling anything. And now we can just trim that back. I'm going to use a circular soft tissue tri-fin to clear out around the multiunit abutment. So now we've removed his maxillary prosthesis his provisional and we uncovered the two implants which we did not get to 35 N-cm at placement. So we're going to place our final multiunit abutments. We have a 30 degree angle multiunit abutment for the molar and the 17 degree for the premolar area. Open real wide Mike. Thank you. Here we go. And we'll place the 17 degree. So now I just have some pins in to show the angulation of the abutments. Just checking with Greg to make sure he likes the alignment that's a 17 degree multiunit abutment. Is that going to be reasonable for you? Do you need to rotate it or do you think that's good right there? Okay. So we're applying the open tray impression coping to the multiunit abutments and we'll have six of these since we're utilizing six fixtures on the maxilla. Open wide Michael. Thank you. And don't bite down yet. There's a metal post sticking up. Here he is with his fixture level impression copings and we're ready to take the final impression for the CAD/CAM bar. |


 FAGD/MAGD Credit Approval does not imply acceptance by a state or provincial board of dentistry or AGD endorsement 7/31/2018 to 7/31/2021 Provider ID# 317928
 Submitting...