Learn From the Dental Industry's TOP LEADERS!
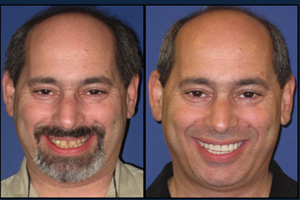
Sit Chairside withDr. Dennis WellsCreator ofDURAthin® Prepless Veneers- OR -
|
Immediate Fixed Implant Supported Hybrid Prosthesis (all-on-4 technique) from start to finish, a complete casePart 3 - Placement of Implant Fixtures
Instructors:
Dr. Margolin demonstrates the placement of the implant fixtures.
Okay. So now we're ready to place our implant fixtures. And we need to achieve 35 N-cm on those to be able to load them. As I said we under-prepare the bones so that we should be good. These are the NobelActive. These are regular platform 13 mm in length. And we're nice and tight from that sound on our unit. We're at 46 N-cm. So we can go ahead and use our torque wrench to finish our placement. We're a little tight. What we'll do is place it. The NobelActive has cutting threads which will actually compress the bone and we can relieve a little bit. And go ahead and then go back and replace it with our torque wrench. Sitting right here we're getting to about 65 N-cm to 70N-cm. Suction for me right here. And we're right at the crest of the bone. The bone is a little higher on our palate than on our facial. But that's a nice position right there. We're getting to about 40 N-cm on this one. So we're not hitting as much as on the anterior but at 40 we're still within our realm for being able to utilize that fixture for immediate loading. With that last fixture we shows you why we under prepare especially in the maxilla where the bone density is not as great as in your mandible. If we have prepared to the recommended sequence then we definitely would have been at the required torque. Once again in the premolar region bone was a little softer there. Okay. Now we're ready to put the distal fixture in and something that you have to think about that's a little different with the distal fixtures as opposed to the parallel anterior is that when you place the implant in an angle you're going to have bone over the top of your platform on the distal aspect. So its very important to check and make sure you have adequate bone removal there prior to loading your abutment otherwise you're not going to have space for you abutments to seat correctly. We're ready to place our second angle fixture. Once again we're at about 35 N-cm. So we'll evaluate now. We need to check and make sure that we have adequate clearance on our bone on the distal which looks good on our upper right posterior fixture. If not then we need to use a bone mill in order to remove some bone but his bone is soft enough I could just make sure with a hand instrument that I'm going to have adequate clearance there. Let's switch this over. Check the other side. So first thing we do is place the guide which will guide the bone mill. Bone mill is basically a [tri-fin] which is a rounded tri-fin that will fit over the meal. Basically just clear off over the guide and basically just clear off the bone around the color of the implant to create room for our multiunit abutment. And the guide guides the tri-fin also protects the color of the implant. And now I can see my whole color. I just now use a surgical bur to flatten off that ridge. So with the angle abutments these come with a holder to help placement and they also help you see your angulation to make sure you're parallel like you like. And not only that, it also prevents your retention screw from becoming dislodged during placement. Cause as you can imagine these things can be small and slippery. Okay. Suction on the premolar for me. Now we're going to go ahead and place this abutment on this one. We're at about 30 but we have six fixtures and most of our pressure will be placed towards the distal abutment. Okay. Now I can get that seated and it looks like a good angulation right there. I'd have to go 17. Now on the posterior fixtures, we're going to go with 30 degree angle multiunit abutments. And we'll suture him up and now we'll double check with your denture to make sure that all of our abutments are where we want them. We're going to put on some healing abutment to keep the tissue from collapsing too much around there to hold it out in position and if everything looks good with our denture, we can go ahead torque those abutments down and get ready to reline them. These are the white multiunit healing caps. And these are simply use during the procedure cause it takes about an hour to an hour and a half for the lab to reline the prosthesis just to keep the tissue out of the way during the healing and we'll just put those on to help us in suturing. So we're finishing up our suturing here. Our patient flies in from out of town. He's from Chicago and we're in Dallas so we're using resorbable sutures today. We use some 5-0, coated vicryl which is the coated vicryl rapid which are much faster resorbing, the vicryls take about a month to break down and these should be gone in about 2-3 weeks. We did that to position our papillae and now we're going in with some 4.0 chromic gut which is much faster absorbing like 10-14 days and this is just approximating things to get a little better closure for him. And as soon as we finish with our suturing, we'll be ready to then enter our restorative phase, start building his fixed transitional. And from a surgical aspect it's a nice thing to do for the patient is to use a quick resolving suture I think chromic gut would probably be the best suture to use. Try to retrieve your sutures from underneath the screw retained prosthesis is sometimes difficult to get to and also can be uncomfortable for the patients without removing the entire appliance. So if you use a chromic gut they'll often exfoliate on their own or they break down. So they're much easier to remove. So I would definitely use a quicker resorbing suture when doing these procedures. I think chromic cut is probably the best one. |


 FAGD/MAGD Credit Approval does not imply acceptance by a state or provincial board of dentistry or AGD endorsement 7/31/2018 to 7/31/2021 Provider ID# 317928
 Submitting...