Learn From the Dental Industry's TOP LEADERS!
Sit Chairside withDr. Dennis WellsCreator ofDURAthin® Prepless Veneers- OR -
|
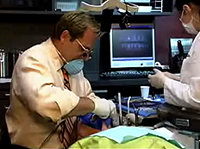
Part 2 - Master ImpressionsSo we like to use these dry aids to help us keep things really controlled and we're going to use light and heavy body and we're going to be sure that we put the light body on every single tooth not just the teeth we're working on because again we need a super clean impression from back to front. We're going to use a lower tray, a tip I learned from John Eubank. These are Teledyne Master trays and we found that the lower trays worked beautifully for both top and bottom and they eliminate overflowing the palate and creating some issues there. Okay. Dear, open real wide for us here. So as you can see I'm expressing this light body around the margins of the teeth as though we had prepared margins but in fact we don't have prepared margins but we want to have a very well recorded and bubble free, very accurate recording of that area. Now once I've got the margins covered then I'm going to come back and cover the entire teeth like so. We're using aqua seal material light body. The heavy body part of this is [0:16:25] [Indiscernible] brand it's a less expensive material that we found works really well as the heavy body not being quite so critical. We like to use the aqua seal as our light body. It seems to flow and make just a beautiful impression and very user friendly. These are both fast setting materials so we set a timer and after three minutes we'll be able to remove this.
So it's super important that you take two master impressions when you're doing this style of dentistry. The time we're spending to create beautiful prototypes is so significant that if we find out for some reason there was something unexpected in the impression that causes us after we make it that is going to be a bad day. So just go on and capture your two master impressions right in the beginning and then we'll always have a backup and we'll be safe there. Okay. Okay. so we're going to use blue moose. Since we've equilibrated this patient and feel good about the orthopedic position of her mandible, we're just going to simply have her close together and to MIP. Okay. So the blue moose is set. Now we're going to go ahead and open. Great. Now take a look at the blue moose and be sure that all of her contacts are in place and they are. Okay. So another step we need to do now is take a couple of shade photos. We do not like to call these stump shade, which would be the conventional terminology, but rather these are the preexisting shade colors that once again our ceramist will need to know as he's choosing his color palate to end up with the final end result we're looking for.
So we're not using the traditional stump shade color ranges. We're looking at more of [0:18:44] [Indiscernible] shade. I think the closest one I see here to matching her natural teeth is somewhere in the B1 range. That's fairly close. So we'll go ahead and snap a couple of photos with that. Another simple point or two or to be sure that your shade guide is in the same plane of reference as the teeth and then to be sure when you take your picture that the ceramist can read the actual letter and number of the shade guide otherwise it's the mystery color.
So to kind of recap where we are at this point, we've done all of the setup which includes being certain we don't have no dental disease in terms of caries or periodontal disease. We've done the setup in being certain that we have the proper tissue height. We've done our mockup to assure ourselves that doing additive only, we can come out with a look that we're going to all be happy about and thrilled about. We've now made our master impressions. We've prophyied the teeth, we've closed in the black triangle. We're going to go on and take out that little bit of composite now that we've placed in there because we no longer need that.
|
 Submitting...


 FAGD/MAGD Credit Approval does not imply acceptance by a state or provincial board of dentistry or AGD endorsement 7/31/2018 to 7/31/2021 Provider ID# 317928