Learn From the Dental Industry's TOP LEADERS!
Sit Chairside withDr. Dennis WellsCreator ofDURAthin® Prepless Veneers- OR -
|
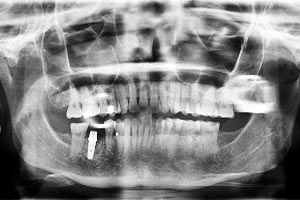
Implantology Breakthroughs for the GP Part IIPart 4 - Immediate Implant after ExtractionOkay. So this next case that we're going to be doing here is a patient. We already prep his anterior six teeth for crowns. We did some other works on his lowers. But right now, we're focused today on extracting #2 and #5. We'll be placing implants immediately into the sockets. So, we'll definitely going to have plan Bs involved in this. Meaning when we get down there into his bone, we don't know what we're going to find. We don't know what bony walls are missing. So we want to think about all the things that could go on while we're placing this case. Therefore, it can be successful while we're doing it. Okay. Obviously, this root canal is super erupted and it's left behind maybe got a [0:00:47][inaudible] most likely cement up there or a sealer I should say. And so we're going want our implant to go right up to there but we may have a fistula right here. We might even have a bony defect. So when we take that tooth out, we're going to probe around up there and see if we have any bony defects. If we don't or if we have a minor one that we think we can work around, we're going to place probably 11.5 x 3.7 there. But also notice that we've got a nice little dip in the sinus right here. We can actually place a 3.7 x 10 right here and allow #5 to be cantilever. So we've got a couple of options there. I do not think we need to go do a funky angle right here to get an anterior implant. In fact, an angulation this way with these two abutments really wouldn't serve us well for a bridge. That will bring a top or coronal part of the implant further from the cantilever making that cantilever probably not that suitable for something long term. It probably last but it just wouldn't be that ideal. So two implants. One in the back and then one either in site 4 or 5. We're going to try 5 first to go for that. In the back here, we've got tooth #2 that's super erupted. You can see the apex. It used to be all the way up to the sinus floor which is right here. We got now 3-mm below the current apex of the tooth. So, what we'll do is take the tooth out. Measure roughly how much tooth was in the bone. And then we'll want to make our final implant 3 mm longer than that measurement. It's looking right now about 8-mm implant. Probably a 4.7 or 5.7 x 8 back there. So we'll try to get at least 20 Newton torque on that to get anterior implant in there. We will not prep for the final bridge today. We'll let that area heal up and we'll probably do a finger graft or two in there. Let it heal up. We'll probably give it two months of healing cause a short implant in a poor socket site usually needs some good time to begin integrating before you take the healing caps off. If you take a healing cap off early just to take an impression saying well taking the healing cap off but I won't seat the bridge for a couple of months after that, you'll often times unscrew the healing cap with the implant. What's some periodontist believe is that after the implant is placed its real firm, but 30 days later they believe the bone kind of lifts away from the implant. So you can actually [unscrew] those before it finally integrates. So that can be the case with those. So let's go and do this case then we'll be back to talk about it. So we're going to be extracting #2 and #5 here. You can see we've got great bone width. I'm just going to check out the bone down here. Good buccal bone plate. Lingual, plenty of bone both here and on #2. We're into the bone right there so we can go 5.7 bone right here. So plenty of bone width. It's our bone depth that we're going to watch here. Our sites will either be # 4 here or # 5 depending on what we run into down there. We're going go ahead and kind of just separate the keratinized tissue, which will be later used for a finger graft here. So we're just going to gently separate the keratinized tissue which will go right around the implant. I like to make sure we take care in saving the extracted teeth so we can get a good measurement on those for the final implant. How are you doing? You feeling anything? You're fine. Good. Good. It looks like we're in good shape. We just kind of drill around here. I found it's easier to separate this keratinized tissue while the teeth are in there as opposed to do afterwards to do your finger graft. So we're just going, kind of work around here. So we're going to take out the distal buccal root first there and kind of inspect its length. So we got a length from the bone. He's only in there about 4 or 5 mm. Mesial buccal root about the same 4 or 5 mm. And then our lingual root here. A little longer maybe 5 to 6 mm. So our next step on that back tooth is we'll let that #5 sit there a while. So we're going to go in here and kind of take a peak so that lingual root got good buccal distal bone. Got a little keratinized tissue right here. We're going to take that out a little bit. We don't need that in there. We kind of look for an ideal place to put this implant. We got good buccal bone right here. We'll take a look at the extra. I think we'll go with the 5.7 x 8 implant. I'm still cleaning out some of this granulation tissue in here. That looks good. Excellent. So we're going to go ahead and just going to try get an extra 2 or 3 mm down with this. So we're going to go ahead and do that. We're right in the lingual root. We're going to place it lingually just a little bit. Here we go. We're down about 13 tissue height. So we'll go to our second drill here. Just open up a little bit more. That was a 2.8. Now, we're going to the 3.4 here. There we go. And the 3.8 here. So 3.8 now. We're going to do a 5.7 implant. And then we'll go to a 4.4 for a 5.7 and we'll use that for a final drill. So over a millimeter smaller diameter for the final drill. All right let's go ahead. Hope we got that 5.7. Take him out of his carrier. Good. So we'll go ahead and put him down into place. Just a little pressure. Are you okay? Good. Okay. We're about 15 Newton of pressure there. It's about all the torque we're going to get in a site that really doesn't have any bone. So we're going to let this seat a good three months. Fifteen Newton will serve you. If you have primary stability you will get osseointegration. So why won't we bone graft in a case like this. So looking right down there, we're looking at our implant. We got good bone right on the lingual portion of that implant. Good bone on the palatal. So we don't really need a bone graft around it. It's surrounded by bone. It's down there but this is all redundant tissue from that extraction so we're going to get a lot of keratinized tissue really regressing back. And so we'll go ahead and slide just a healing cap on that. We want this tissue to be nicely formed for when we take the final impression. We're good in there and just put that guy in place. If you have a high enough healing collar on there, your gum tissue is going to be much better contoured for your final crown or bridge impression and you're going to have to do with less work with tissue contouring. So we'll put a 4 on there. That looks a lot better. So let's go ahead and do a finger graft. We'll use a Bard-Parker blade for that. So let's examine the site. So this will normally granulate right here. So our implant is on the lingula root right here. The buccal roots are exposed so we're going to go ahead and take this nice extra keratinized tissue and just wrap it around to the back. So we'll think of where we're going to suture this. So we're going to keep it attached right here, make an incision, and create a finger. Put a suture right here. Pull it around that implant, attach it. That's going to do two things. One, it's going to allow quick keratinized tissue regrowth around the implant. Two, it's going to provide a matrix for this blood clot in the buccal roots which will eventually turn to collagen and then finally bone. So let's go ahead and do that right now. There we go and we'll use our other favorite instrument here just to reflect that. If you have any exposed bone up here on the edge like right here, we'll just take that off with a high speed handpiece. So we're just going to smooth that bone off a little bit so there's no rough area. The tricky part can sometimes be suturing the end of this movable tag so often times before I actually cut the tag of tissue off or the pedicle graft, the finger graft whatever we want to call it, I will get them with the suture. But if you're going to do it afterwards, you got to kind of pin them somewhere. So I pin them on a lingual. And there we go. We got them pinned. So we pull a suture through that and then just kind of think where you can suture it where that tag end is going to pull around the implant. So I think right about there will allow that finger graft to kind of mold right around that site. So let's see how it looks when we pull them together. Let's do one suture here. I think I'm going to suture in that position but I need to do one more suture to the facial. So I'm going to go ahead and tie this one off and then put one more suture in there cause it is a fairly large extraction site. Let's clip that one off. I'll grab that other piece right there. And so we're going to actually put a third suture in this just to pull every part of keratinized tissue into the place that we wanted to be in. So right here we just have this last little piece then we're going to tag to this wall right here. So we're going to get in or even stick both of them in one shot here. All right, that will pull him down to where we want him. Here we go. That looks good. It's important to note that you don't need to get primary closure with the finger graft. What's more important is that you got keratinized tissue kind of right around the circumference of that implant. So that keratinized tissue is going to regress down, heal down, and just go right over the granulation tissue and create a really great environment just about a month's time for the final prosthetic impression. In this case, we'll probably going to wait more like three months. So there we go. There's the Frank finger graft. I'm just going to take the blood off of there. But what have we achieved there we basically provided a matrix for that implant. Now you can see that healing cap more clearly right there. This keratinized tissue right here is going to heal right over it so that's where our new tooth is coming out right there. So let's move to the next tooth in front for #5 and do something similar. So we got about 4 mm. The first thing I'm going to do is check to see how our bone walls are down there with our favorite instrument. Good. I'm going to put my finger, see if I can poke through. No, I can't poke through. Good bone there. Good bone on the palatal as well. So what we're going to do is just take our initial bur down there and when I make the initial, so here's an important point to remember. When you go down the sockets site it's going to go right to the apex. I always aim a little to the palatal to make the initial hole then straighten it out. What that does is it brings our implant hole or implant osteotomy more toward the lingual aspect of the socket that ensure that you're not going to break through buccal plate as you're going down further. So like I said so we'll aim it to the palatal, go through and then straighten it out. And there we go. It looks really nice. So we're down about 14.7 right here. So that will be perfect for an 11.5 implant. So we're just going to go one more drill here. We've got a 14.5 depth at the tissue which is perfect for a 11.5. So before placing the last implant always cover it with some cotton. Go ahead and bite down if you would. We're going to go through a 3.4 for a 4.7 and then a 3.8 will be our final drill for the 4.7. So a 3.8 will be our final for a 4.7 in this particular case. Good. So I was going to place a 3.7 but when we got in there, we had so much good bone that we'd elected to go a little wider on the implant size. Why would we do that? Well certainly with a single tooth that wouldn't be necessary. But that slightly greater diameter with a 4.7 really adds a lot of surface area to the implant. And now we're going to go ahead and insert that into the extraction site. We're about 20 Newton right now, continue to be 20 Newton. Still a lot 20. Toward the end, we're getting more toward 30, 40, about 50 right there. So that's really good. We're going to stop right there at about 50 Newton. And we'll go ahead and take the abutment off here. I'm going to do something just to kind of demonstrate what to do if we have, Pam would you mind passing me that cover screw for the 4.7 that you just did. Here it is. So let's take a peak around the implant and verify that our bone is all below or at the implant level. What we're going to do is first put on a cover screw on the implant. We're going to take our high speed in there and do any bone trimming that we may need to do. So we got a cover screw to protect the implant. Let's just kind of palpate around that and see if there's any excess bone around the top right. So right here, there's a little bone. We might want to trim that and also just to the mesial, there's a little extra bone right here that we might want to trim. So we're going to go ahead and take our same bone drill we've been using and just kind of remove a little bit of that and even contour the tissue a little bit. There we go. And then we'll take the cover screw off. It actually just got quickly unscrewed by the high speed. And we'll go ahead and place a soft tissue former or healing abutment right there. One nice thing about using an implant that's about as wide as the socket is you often times don't have any gap between the bone interface so right here it looks pretty good. We don't really have any gaps there. So we don't need to use the finger graft. |

 FAGD/MAGD Credit Approval does not imply acceptance by a state or provincial board of dentistry or AGD endorsement 7/31/2018 to 7/31/2021 Provider ID# 317928
 Submitting...