Learn From the Dental Industry's TOP LEADERS!
Sit Chairside withDr. Dennis WellsCreator ofDURAthin® Prepless Veneers- OR -
|
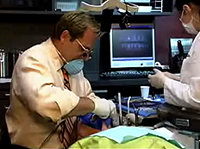
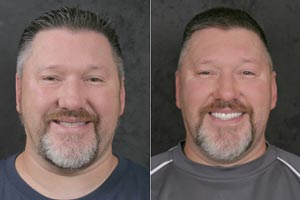
Immediate denture surgery for Strickland Facelift DenturesPart 1 - ExtractionHi, I’m Dr. Mark Whitmore. We’ve got a very interesting case that we’re going to show you today. We have a gentleman for whom we have fabricated facelift dentures; upper and lower full facelift dentures. He has seven existing teeth in the mandible #21-27. You see here in the pictures his before picture and a full smile. Let me show you, I think you’ll find this interesting. Very common situation when a patient has had existing dentures that are made more from a traditional technique. You see a lot of close down the vertical. His nose and his chin are much closer together than we would prefer. So you see his existing denture and the seven teeth in the lower that we’re going to remove. And of course here he is without his denture in place. As you can see here he has #27-#21. You can see the reason for the removal of the teeth, very badly broken down. It is true that we could have saved his incisor #23-#26 but I don’t see any purpose in only having four teeth from a prosthetic solution, from restorative and occlusion solution. So we’re going to remove this. I want to make a point here. Each of these teeth is pretty much in its full length. No significant levels of bone loss due to periodontal disease in this case. So we’re going to have to be very careful. I’m going to be very careful when I remove these teeth as to not lose any of the alveolar bone. We’re going to be removing these teeth through a lot of elevation, a lot of very careful extraction with the forceps maintaining and not losing any of the buccal cortical surface aspect of each of these teeth in the sockets. And we’re also going to be placing a bone graft material, DynaBlast human cadaver bone putty. So we’ll be showing you that as well. So we’re going to begin with a local anesthetic. Whenever I give mandibular anesthetic, I use a cocktail technique. Begin with plain 3% Carbocaine. So I’d do a block with a plain Carbocaine. Then I follow the plain Carbocaine with the 4% articaine that I use for infiltration on the facial on each of the teeth that we’re going to be working with. So beginning over on #21, I just infiltrate each of these one by one. Another 4%. A nice array of infiltrations here across the entire buccal aspect of these teeth. Now I’m going to go to a 2% lidocaine for another block. As you can see here, I’m using a disposal Septodent system. I really like this a lot. The fact that they’re not metal in the automatic little cover sleeve. I really like. I think they’re very patient friendly if such a thing is possible with local anesthetic. Okay. I’m going to begin by making some incisions, so just intrasulcular incisions here along the root. There’s a lot of reason why I like to make the incision to lay a flap primarily for the architecture of the suturing once I’ve placed my bone graft material. It’s nice to have everything very ideal. The most important thing that I want you to look for in the extraction technique is the rate at which I elevate and how slowly I proceed with elevation. The one thing I’ve learned in 30 years of removing teeth is that the slower that you remove a tooth the faster the entire process is. So, not only do I not want to break any of the roots off obviously which would most likely mean more removal of the bone but I want to maintain all of the alveolar bone. I don’t want to intentionally lose any of the height of that bone as we’re doing the bone grafting procedure. So we’re going to be taking that very slow, doing a lot of elevation with a 301 elevator prior to placing the forceps on the tooth on individual teeth to remove them. A classic periosteal elevator here. I’ll start pushing on the papilla here to create a flap. Okay. It’s real important when we remove teeth that we make a very very serious attempt to save all the alveolar bone as possible. One of the ways that we’re successful with that is by doing a lot of elevation. So I’m using a 301, a very sharp 301 here as you can see to really do a lot of elevation of the root of the tooth before I even begin to think about taking any of these out. I want to get a lot of movement in the alveolus so we don’t lose any bone on the buccal on the facial aspect of these teeth. And the other thing that is so important in any simple extraction is to go slow. We get in a hurry is when I have issue like losing bone or breaking roots. Oral surgery, if you take it slow it goes fast. Okay. Continuing around here. Here we go. See I’m really getting a lot of nice movement on this #22. Obviously, cuspids are the most difficult teeth to remove because of the long root and the position of the alveolus. Okay. Now I’m going to go use a 151. You see I’m going to get a position on that tooth there. I want you to go a little bit more wide and slow and just rock it back and forth. The same thing now on #22. Let me jump over here to #27 see if it’s moving. Slow pressure. So I go buccal, lingual. So what the concept here is that you’re breaking up the periodontal ligament in the alveolus little by little such that once you have it completely done there’s macro bleeding going on down there and these teeth will practically hop out once you’ve accomplished that. But you got to take it slow and go way back to it over and over. Okay, #22, buccal, hold it. Lingual, hold it. That one came out easier than I thought. Let’s go ahead and see if we can get some more movement on #21. Again, let’s see if #27 is behaving. It’s not quite ready. Okay. Once again just with the 151 general rocking until I feel that it’s really ready to come out. You can always do a rotational movement but don’t over do that. Once again anything that might damage the alveola we don’t want to do. We want to save as much of the height of the bone as possible. At least until we begin intentionally doing any alveoloplasty. One more to go, #27. That kind of hold it in there. Once again, you’re really pushing it buccal, lingual, holding it buccal, lingual. We’ll let that sit for just a bit. Looking good. Looking really good. I will go and do a little elective alveoloplasty with the rongeurs here in just a moment primarily for the purpose of the fit of the denture. But even then I want to be very conservative with that. Don’t over do it. And #27 is gone. Okay. So now let’s take rongeurs. Excuse me, the periosteal elevator. Make sure we see what’s what. Now we have that. So, a little bit of the crest here. That kind of snips with the rongeurs. These are some really small rongeurs. I like them a lot for this procedure. These are apex, nice little a smaller ones. They’re really nice for this getting in here and being very careful, very limited, conservative with the alveoloplasty. I’m running my finger over it feeling for anything that feels sharp that I think will interfere with the denture. Good old surgery technique from long ago. You can turn this over on their in and use this side here for these little clips. Let’s clip that. Once again, I’m running my finger over it. There we go. It feels pretty good. Pretty good. I’m going to be using a putty DynaBlast. It’s a demineralized bone matrix putty also contains cancellous bone. This is human cadaver bone. I’ve been using this for about 2.5 years now. Pretty much using this everywhere in our practice now when we do bone grafting. Occasionally, we do use porcelain materials but we really how quickly the patient heals when we use the human cadaver bone graft. And that’s DynaBlast from Keystone is a great product. We really like it a lot. So let me show you how it happens. I’m going to change and put my sterile surgical gloves on. Let me mention this. Whenever we do bone grafting, we pre-medicated the patient on amoxicillin and he will take amoxicillin for the next week. There is some evidence I think some good evidence that the bone graft material heals more quickly etc. when they’re on some antibiotic and amoxicillin is the go to for that. And you see here’s my putty DynaBlast. This has about quarter of a cc. I’m sorry 1-cc. So you take off the little top here. You can see it’s a putty and let’s go. Now in this case because I didn’t have any periapical cyst involved I’m not really going to be worried about – let’s start up here on this left one so suction it out really well. Going back to #21 there. Good. I’m not too concerned about a lot of curettage in this case. |
 Submitting...


 FAGD/MAGD Credit Approval does not imply acceptance by a state or provincial board of dentistry or AGD endorsement 7/31/2018 to 7/31/2021 Provider ID# 317928