Learn From the Dental Industry's TOP LEADERS!
Sit Chairside withDr. Dennis WellsCreator ofDURAthin® Prepless Veneers- OR -
|
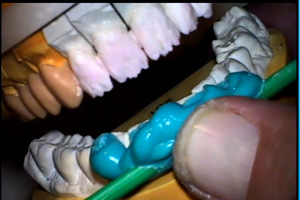
Building the Bridge from Dentist to Ceramist: Why Communication Matters Part IIPart 5 - Dr. Tom Trinkner seats the final restorations.Oh it was so exciting, I went and opened my mouth cause my children knew what my mouth looked like with my fillings and my husband and said Look, Look and the ladies at work I said you remember how my mouth looked before with the silver fillings and stuff, look at this and they were very impressed. Today is delivery day and we're back with Judy. We've had the opportunity to verify everything occlusally, phonetically, and aesthetically with her provisionals over a period of time. Her restorations have been fabricated at the lab, we're about 2 months out now from the initial preparation. And in the interim we've also replaced all the amalgams on the lower arch and in addition to that prepared two of the molars on the right side for full coverage crowns that will be made with Zirconium substructures. We're going to start today with inserting those two restorations. Everything has been cross-mounted and verified occlusally at the laboratory and we will use the Unicem cement for the cementation of these particular two crowns. After a chlorhexidine rinse Dr. Trinkner will describe why he likes to use a cementable crown. She's just for this interim she's got some really good tissue health. It appears that even though we had to go sub gingival in several areas she's doing really well. Another reason why we wanted to use a cementable crown because of the fact that we would have a lot of difficulty getting a nice isolated field so we'll go ahead and try each one of these individual restorations in for marginal fit and one of the challenges of these particular two teeth is that there is an extremely dark substructure. Certainly porcelain fused to metal restorations could have been indicated here but we chose to stay completely within the same material throughout the entire case, which was a Yeah we're Lava substructure. Let's bite together for me. OK. Yeah we're not too far off here. Let's mark her bite. And bite together, grind a little. Good. Ok. Now most of the occlusal variation is in her upper provisionals so I'm going to take this adjustment off of the upper provisional material first. And we've got a natural upper 2nd molar and I'm most concerned with the occlusal relationship between 31 and 2. How about now Great. Comfy. Uh huh. Ok. Great, all right. Let's cement these two lower restorations here. So we're currently using the Unicem cement. And this is the new quicker delivery system. I like to brush away a little of the excess just so I have less of a clean up. Let's close down and hold firm pressure on there and hold for a sec. OK. After two minutes, Dr. Trinkner will floss and then light cure to set. Now we're going to go ahead and section some of these provisionals. We've given her 3% Carbocaine plain because of some her intolerance to other anesthetics and we're going to section the distal to the first bicuspids so that I can look at some of the posterior occlusal relationship and make sure that we're right on the money with that. So here we have removed the provisionals from the upper left bridge and the very last molar. We've tried in our restoration and occlusally you can see that we're just right on the money so we have mounted our models correctly, taken a correct transfer of the bite registration, we have occlusion where it needs to be as it relates between number 18 and number 15 and our provisionals are still in their proper occlusal position on the upper anteriors. Now we're down a little bit, let's bite together, hitting a little funny there too We're getting down to color time. Where we've got to make some decisions and make sure that things are bright enough for you. One of the things that I think is important to point out that even though everything was splinted the entire upper arch and that she did not floss with threaders or do a lot of rigid maintenance on this the tissue is extremely healthy by the way that we chair side trimmed the provisionals prior to cementation and are careful to have those margins really accurate as the patient leaves on the day of preparation. Dr. Trinkner will place the bridges using Unicem resin cement with a quicker delivery, then clean up. Obviously he will have checked with the patients for the color selection before cementing them in. For educational purposes Dr. Trinkner will modify the order of the seating. The order that Dr. Trinkner would normally follow would be the posterior segments first, followed by 8, 9, 7, 10 and then 11, checking the midline after seating the central is very important and should not be under estimated. I think again the significance in this case is that we are using this in a teaching modality for doctors and ceramist so we had some issues about the order of cementation that would otherwise not have happened. Normally we would be cementing the two centrals and then the laterals and then moving from cuspids back but in this particular case it did allow me to verify that my occlusion was on the money by seating some of the posterior restorations first and I felt very comfortable with that considering the extent of the maxillary involvement. So we've gone to doing a try in of our anterior restorations. One of the things you'll notice in this phase we need to verify the color that we are going to use for the anterior veneers is going to be appropriate with the Zirconium bridge and that the patient is extremely pleased with how this all blends together. We still have provisionals at 9, 10, 11 and 12. Here's a closer view of the final restorations as they relate to the provisionals. Now we've detailed a lot more of the anterior guidance and protrusive movements and we've had to make a couple little subtle changes to accommodate anterior guidance but in general our patient is very pleased at the try in phase and we've chosen a A1 RelyX veneer cement to be used for the final cementations which I think will give us the nicest blend to our Zirconium bridge. So we're going to go ahead and etch. I've got to paint this on and wash it one time. And we're going to go ahead and prime. This happens to be a fourth generation Optibond material with primer in one bottle, the adhesive in the second bottle. That's a 2 FL bottle. This is a type of a system that I've used fourth generation for approximately 10-11 years now. Placing the primer in the warm air dryer will help us with the evaporation of the primer. Again we'll be holding off of cementing tooth 8 and 12 for educational purposes. One of the challenging parts of this process is to make sure aesthetically that we do not have a lot of spaces that are a result of this stagger. Cement this lateral here first. Let's get this clean and then we'll stop. And the cement that we're using here is the RelyX A1 veneer cementation material. And let's tack that. And we're going to hold this in place and lightly tack that way high at the cervical area about 1mm of ceramic is underneath the curing light and then clean the rest of the restoration completely well. Dr. Trinkner will continue to seat the final veneers, lightly tacking 1mm above the cervical area. Then continue to clean up. Then finally running a floss between the teeth to check contacts. This is just some glycerin to make sure that we have a complete cure at the marginal areas, prevent the formation of oxygen inhibiting layer. So this is our final cementation, we've got a majority of the cement cleaned up and in it's pre-cured state we're really meticulous about trying to brush that clean prior to that you see how there is very little trauma to the tissue. We'll check her at about a 2-3 day appointment to go over the occlusion again. We had about 3 or 4 minutes of occlusal adjustment which is minimal in considering the extent of this kind of case and extremely happy with that because of the detail that we put into the provisionals and the cross mounting of the models at the laboratory. She should have a lot less trauma and a lot less sensitivity following this insertion due to the fact that we weren't so aggressive during the clean up and having a mix of Zirconium base cores with all the same layering material through out the arch is a predictable way to certainly do a really nice,pretty, aesthetic case that will hopefully be functionally correct for a long period of time for Judy. Thank you for joining us today. For more information about this case,please contact Dr. Tom Trinkner or Matt Roberts on our forum. Both of our presenters return often to answer any questions that you may have. And don't forget to take advantage of your CE. Simply click to take the test and your CE will be emailed to you upon completion of the test. HDiQ Dental is excited to announce that you can now watch for free. That's right. All you have to do is let your associates know about the positive experience you've had here at HDiQ Dental and if they sign up and you send us their user name, you get a free month. It's that simple. Tell others about us and get a free month. For questions or comments, email info@hdiqdental.com. I'm Marlene Hilton for HDiQ Dental the standard by which the dental education, information, and training industry is judged. We'll see you next time. |
 FAGD/MAGD Credit Approval does not imply acceptance by a state or provincial board of dentistry or AGD endorsement 7/31/2018 to 7/31/2021 Provider ID# 317928
 Submitting...