Learn From the Dental Industry's TOP LEADERS!
Sit Chairside withDr. Dennis WellsCreator ofDURAthin® Prepless Veneers- OR -
|
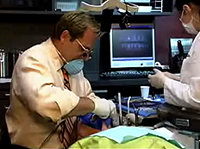
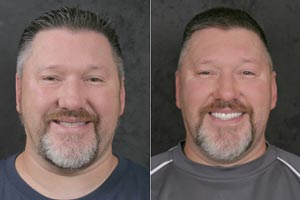
Immediate denture surgery for Strickland Facelift DenturesPart 2 - Bone GraftOnce again, we’re using bone graft material here to try to support the height of the alveolus. We’re not going to be placing any implants at this time but we certainly I feel like – go ahead and suction more on that socket there for #27. Beautiful. We’ve certainly created a nice healing environment such that if implants are in his future I feel like – so I’m just going to use that 2x2 here just to pack that in. See how I fill all those in. It’s almost like a composite material. Great. So see how we kind of fill in all the sockets with the DynaBlast there. Just going to use that to putty cake everything in. So we got the material in each one of that sockets there. Watch his tongue. Yeah. That’s good. We may a little bit run over here in #22 area. See right there. Suction that a little bit more. There we go. Good. All right, often times especially in a single extraction area maybe in an esthetic zone upper anterior or an area where I’m concern about adjacent bone loss etc., we might use a membrane on top of this. I’m not going to use a membrane today because we’re going to be like I say placing immediate dentures already. Anyway the immediate dentures will act as a nice bandage to hold everything together. We will be instructing the patient not to remove the denture. He’ll be back in our office in 24 hours and we will remove the denture and inspect the site. And every time I’ve done it this way, the next day we’ve got really nice clotting and actually nice containment of the bone graft material. So I have really found that it’s not usually necessary to do any membranes on most of these cases when they’re just pretty straightforward like this. All right. Breathe for me there, sir. There we go. Okay. So what I’m going to be doing here is a continuous suture just going papilla to papilla. Okay. It’s going to go papilla to papilla come through, all the way through. There we go. Thanks, Crystal. All right, now when you do a continuous on a final suture, people always go how do you finish it off if you don’t have a tail. What you do is you pull it through. You leave yourself a little loop and then you use that loop as your tail. So loop to my suture and bada bing bada boom. Once again, from that loop right there and just a couple more here. Excuse me, I didn’t tell you. This is a 4-0 PGA suture. This is a suture that dissolves in about 2-3 weeks, sometimes a little longer about 2-3 week time period. So there we go. We got it all continuously sutured from 21-27. All right, we’re taking the bite block out now. Let’s go ahead and insert the – one thing I do, let me go and show this to you on the camera if I can. I always run my finger along the inside when they come back from the lab. Our labs do such a great job. But occasionally they’ll miss a little acrylic spicule and it’s sharp. This one feels pretty good. I’ll do the same thing on the lower. I always do this when I deliver either regular denture case or an immediate case like when I do the surgery. Once again may be a little spicule right here that I’m feeling. Okay so I felt a little roughness right here. I’m going to very carefully just kind of grind that smooth and a little bit right here. I always do that. Like I can say our labs do a great job. They don’t send this back on purpose. But I always like to just run my finger, my gloved finger, in and around just finding any sharp places cause I know I’ll be adjusting later. Okay. So here we go. Let’s put in the upper now. Once again this is the facelift denture technique. Williams Dental Lab, Gilroy, California. Thank you Bob Clark, the greatest denture lab in the world. See we’ve inserted this now and try to get it to close. Just turn it numb in a way. And like I say we’re going to instruct the patient not to take these out. Suction back there. There we go. Okay. There we go. There you have it. Very nice. You know the reason that we are so excited about using a facelift denture technique is that we’re able to recreate the natural dimensions, the natural vertical, the natural tooth placement in teeth which is very different than how traditional full dentures have been fabricated. So you’ll be able to see that in the before and after picture certainly. Also what the patient is going to do is after we leave this appointment I’m going to actually insert the upper and lower denture and that’s the end of our visit for the day. He will be coming back in 24 hours and I have instructed him not to remove the dentures until I see him tomorrow. I’ll remove those dentures very carefully. Start looking at occlusion and some of the things to make sure that we got everything right. |
 Submitting...


 FAGD/MAGD Credit Approval does not imply acceptance by a state or provincial board of dentistry or AGD endorsement 7/31/2018 to 7/31/2021 Provider ID# 317928